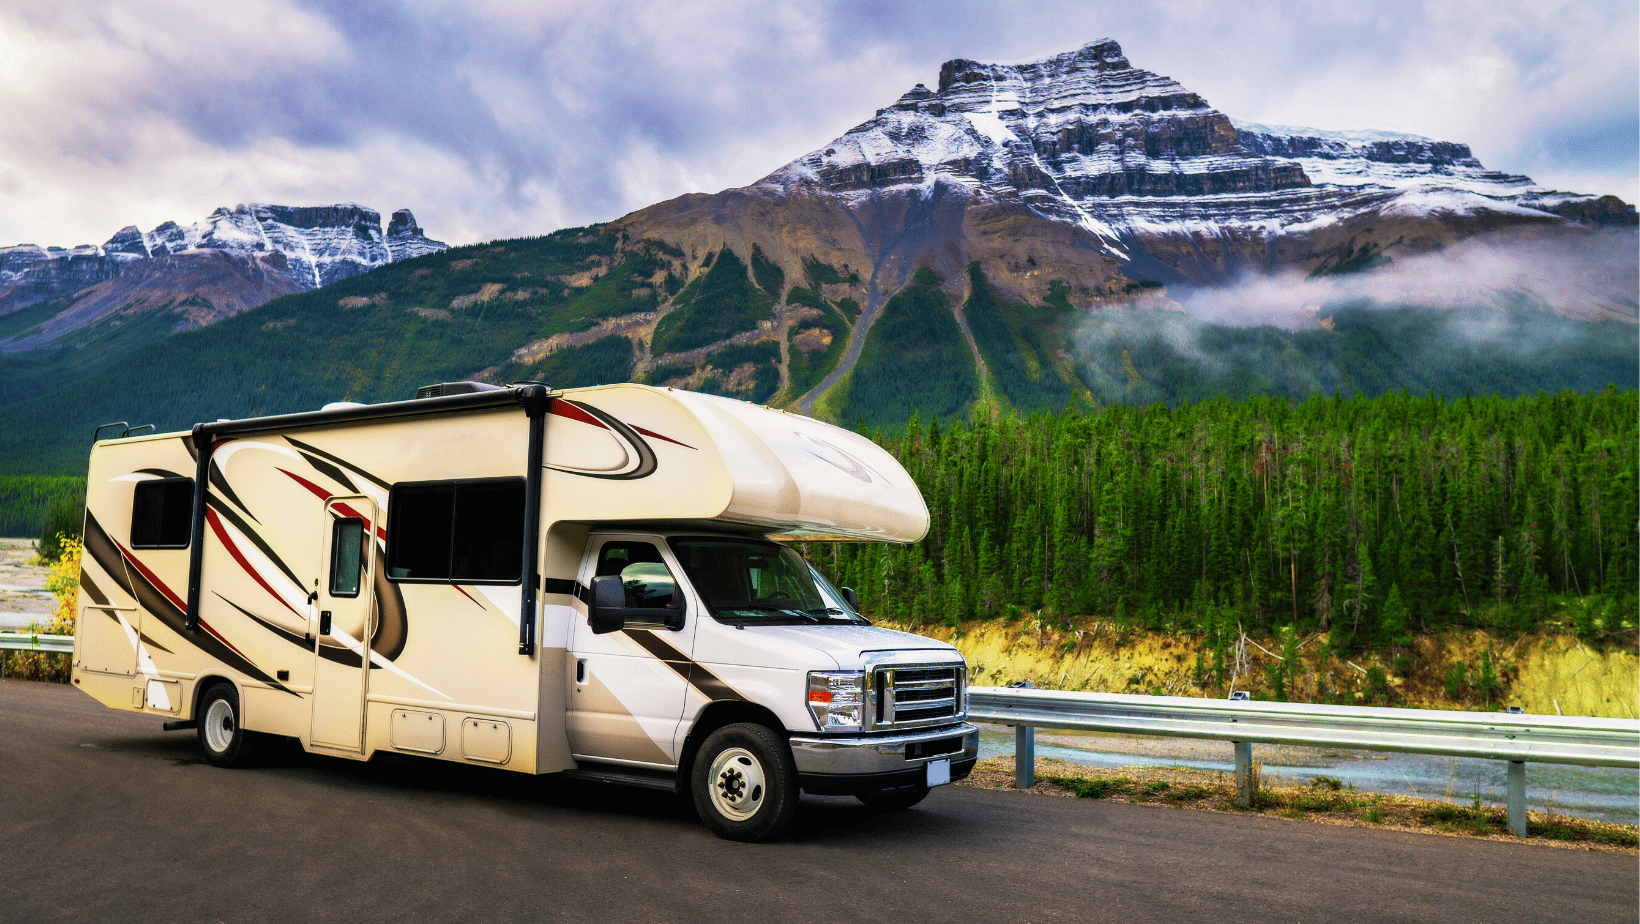
Summer means one thing to RV-loving Saskatchewanians: Camping season is here! But before you hit the open road, it’s important to brush up on a few maintenance tips.
Seasonal maintenance is vital when it comes to RVs. “The last thing you want is to be stuck out on the highway with a flat tire or some other breakdown,” says Peter Kreis, VP of Operations at CAA Saskatchewan.
“You just want to get to your campsite and not have to worry about a thing. Whether you have a trailer or motorhome, a little upkeep now goes a long way when you’re on the road later.”
Whether you're a seasoned traveller or embarking on your first adventure, these eight essential tips will help you optimize your RV's performance, enhance its longevity, and ensure a comfortable and safe ride.
1. Check the interiors
When it comes to the interior of your RV, taking a few proactive steps can go a long way in maintaining its comfort and functionality.
Start by opening doors and windows to allow fresh air to circulate throughout the space, helping to eliminate any musty odours that may have accumulated during storage.
As you inspect the interior, keep a keen eye out for signs of rodent intrusion, such as chewed wires or nests, which can cause significant damage if left unchecked.
Additionally, carefully examine the walls and floors for any indications of water damage, such as soft spots or discoloration, as this could be a sign of leaks that need immediate attention.
To ensure that all systems are in working order, don't forget to turn on the furnace, water heater, and refrigerator, allowing them to run for a short period to identify any potential issues.
2. Inspect the windows
The second step involves inspecting your windows to ensure they are in optimal condition. Conduct a thorough inspection of the window frames, seals, and ledges from both the interior and exterior sides.
Look for any signs of water damage, such as discoloration, soft spots, or mold growth, as these could indicate leaks that require immediate attention.
If you spot any holes or areas of concern, it's essential to reseal or repair them promptly to prevent further water infiltration. For minor repairs, you can often handle them yourself.
However, for more extensive damage or if you're unsure of how to proceed, it's recommended that you consult a certified RV technician who possesses the necessary expertise and knowledge.
3. Maintain the water lines
Maintaining the water lines in your RV is crucial to ensure a clean and functioning water system.
If you used non-toxic RV antifreeze during the winterization process, it's important to flush out the lines before using the water system.
To begin, turn on the water pump and open all faucets, both indoors and outdoors. Let the water run for a few minutes to effectively purge the antifreeze from the system.
This step ensures that you're starting with clean, potable water and eliminates any residual antifreeze taste or odour. Additionally, don't forget to flush the toilet and run the shower to ensure all water lines are thoroughly cleared.
4. Check the exterior
A comprehensive inspection of your RV’s exterior is a crucial step in ensuring its overall condition.
Begin by closely examining the tires, looking for any signs of wear, such as uneven tread or sidewall damage. Check the tire pressure and inflate or replace them as necessary for safe travel.
Move on to inspecting the head and brake lights, ensuring they are all functioning properly for optimal visibility on the road.
Next, pay attention to the hitch, checking for any signs of rust or damage. Lubricate moving parts as needed to maintain smooth operation.
Examine the seams, vents, roof, and windows for any signs of leaks or damage. Look for cracks, gaps, or peeling sealant, as these can lead to water intrusion.
Repair any issues promptly to prevent further damage. If your RV has hydraulic jacks or an awning, inspect them as well. Check for any leaks, damage, or signs of wear. Lubricate the jacks and test their functionality. Inspect the awning for tears or signs of deterioration and clean it thoroughly.
Remember, if you come across more significant issues or are unsure about any repairs, it's always advisable to consult a certified RV technician for professional assistance.
5. Check all the detectors
Properly functioning detectors and fire extinguishers are of utmost importance. Begin by checking all smoke and carbon monoxide detectors in your RV.
Ensure that they are operational by pressing the test buttons and verifying that they emit the appropriate alarms or signals. Replace any detectors that are not functioning correctly or are expired.
In addition to detectors, it's crucial to have operational fire extinguishers on board. Typically, fire extinguishers have a lifespan of up to 15 years.
Check for an expiry date or inspection sticker on your fire extinguishers. If there is no clear expiration date or inspection sticker, it's important to inspect the handle and nozzle.
If you notice any wobbliness or cracks, it's time to replace the fire extinguisher with a new one.
6. Ensure propane safety
When it comes to propane safety in your RV, there are a few key considerations to keep in mind.
Firstly, propane tanks have a shelf life and require recertification every 10 years. It's important to check the expiration date on your propane tank and ensure that it is still within its valid period.
If the tank has expired or is nearing expiration, it's crucial to have it recertified or replaced by a certified professional. Additionally, it's vital to have a functional propane detector installed in your RV.
Propane leaks can be potentially fatal, so having a reliable detector is essential for early detection and warning. Test the propane detector to ensure it is in proper working condition.
7. Check your tires
Proper tire maintenance is crucial for the safety and performance of your RV. Remember that RV tires can lose two to three PSI (pounds per square inch) every month while sitting during the winter.
It's recommended to use a tire pressure gauge to check the tire pressure and refer to your owner's manual for the recommended PSI. If the pressure is below the recommended level, add the necessary amount of air to ensure optimal tire inflation.
It's important to note that some smaller trailers have tires with an expiration date stamped on them. Typically, these tires have a lifespan of up to 7 years.
It's essential to check the sidewalls of your tires for any date codes and be aware of their expiry dates. If the tires are approaching or have exceeded the expiration date, it's crucial to replace them promptly.
8. Check the battery
Like tires, the battery can experience diminished power when the RV is inactive for an extended period.
If you removed the battery for the winter season, it's important to ensure that it is fully charged before reinstalling it in your RV. Use a battery charger or a suitable charging method recommended by the manufacturer to bring the battery to its optimal charge level.
In the case where the battery remained in your RV throughout the winter, it's crucial to check its charge level before your next trip. Use a multimeter or battery tester to assess the battery's voltage.
If the charge is significantly low, it's advisable to recharge the battery using an appropriate charging system to restore its power. You can always consult a certified RV technician for professional assistance.
For all your battery needs, visit CAA Battery Depot–your one-stop battery shop!
Here’s how CAA can help you
Make sure you’ve also got CAA’s RV membership, so you’re covered if you run into trouble on the road.
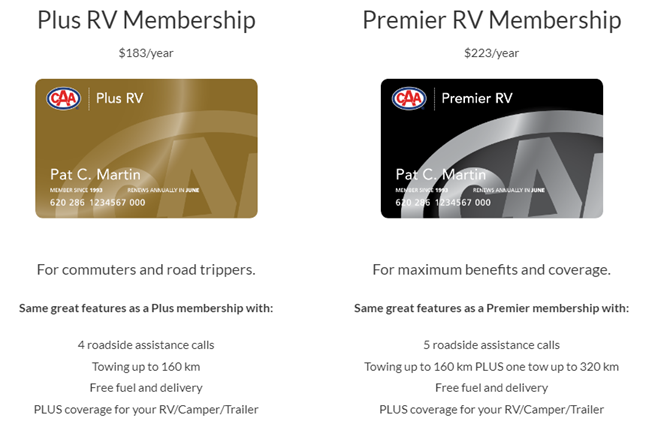
With a CAA Plus RV or Premier RV membership, you get all the benefits of the Plus or Premier membership, which includes up to 160 kilometres of towing in the event of an RV breakdown.
The Premier RV membership also includes one tow of up to 320 km.
The service covers dual-wheel pickup campers, raised-roof vans, motorhomes, and recreational trailers (including, but not restricted to, fifth-wheel trailers) per breakdown for qualifying vehicles.
A CAA Insurance Consultant can help determine the right insurance coverage you will need for your boat, RV, or trailer. Boat insurance is a bit of a combination of home, auto, and liability coverage.
You should have full coverage for both in and out of the water for winter storage. RV’s and trailers, live-in vehicles, are also a combination of coverage.
The contents are often covered under your home and property insurance. The vehicle also needs to be licensed with plates and liability coverage.
CAA can also help you plan your trips! If you want to work with a trusted travel consultant, learn more about what they can help with at CAA Travel.
-1.jpg?width=1260&height=440&name=Summer%20Campaign%20Banner-1260X440-Option%202%20(1)-1.jpg)
